Introduction
Our experts share step-by-step Satellite Antenna Mount Instructions.
-
-
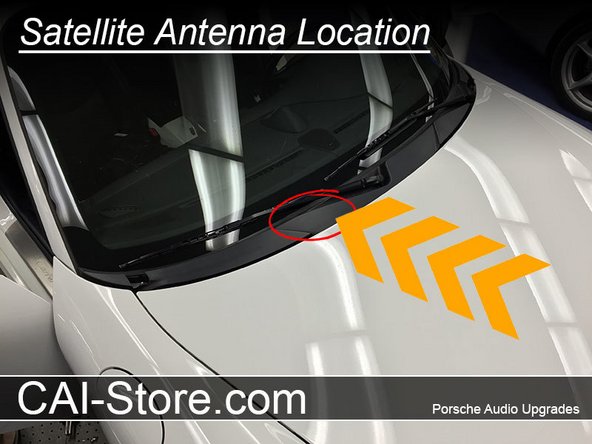
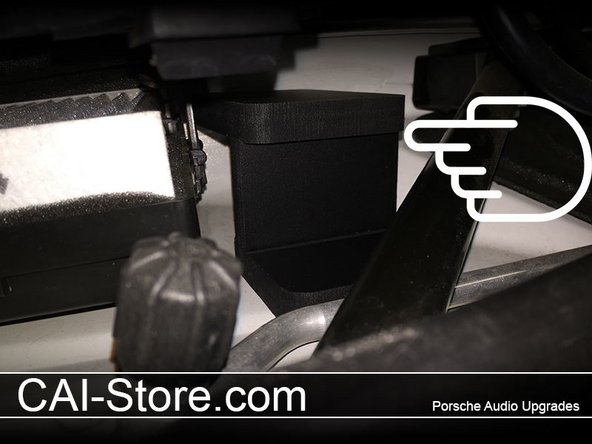
Our optional satellite antenna mount makes installing both navigation and satellite radio antennas a quick and predictable endeavor. The mount is made of a thick rigid plastic. Simply mount under the windshield wiper cowling.
-
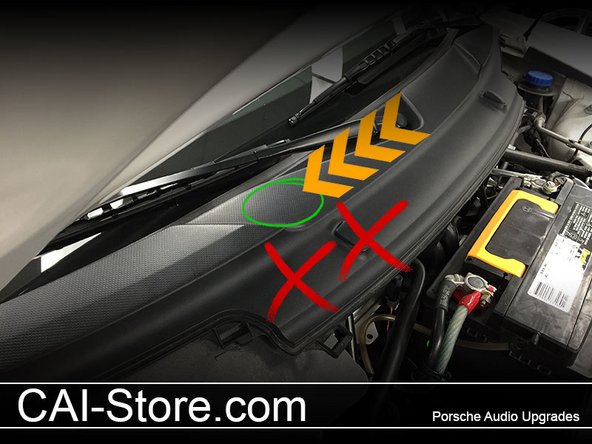
The antenna mount has a large side and a small side. The small side is the bottom and the large side is the top. The bottom of the mount has 3M acrylic mounting tape already applied to it for adhering the mount to your vehicle. Satellite antennas should be mounted to the mount in such a way that they have a clear view of the sky.
-
The plastic cowling on your vehicle is transparent to satellite signals. Make sure that the antenna(s) are not mounted under the part of the plastic cowling that is covered by the vehicles steel hood. Satellite signals will not travel through the hood.
-
-
-
Open trunk and Remove the trim panels in the following order
-
B - Battery Cover
-
A & C
-
-
-
Route cables to the drivers side of the car behind the battery. Zip tie the cables as you go. Be sure not to tie to any moving parts of the windshield wiper system. Remove the single 13 mm battery hold down bolt on the passenger side of the battery. Remove the negative battery terminal.
-
This will allow you to slide the battery towards the passenger side of the car.
-
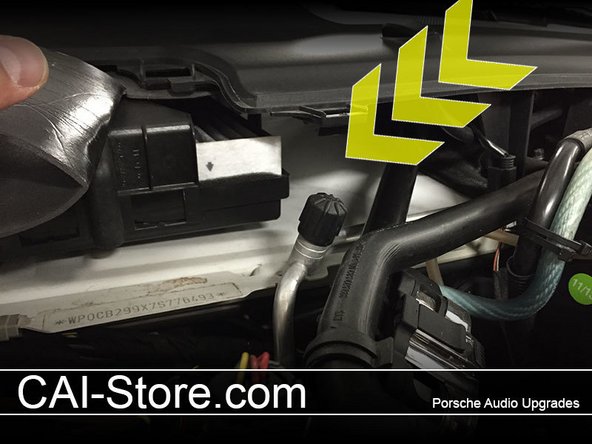
You will now have access to a large blank factory grommet located behind the driers side of the battery. Push the grommet into the passenger compartment of the car. From inside the car pull the grommet out and any fuzzy sound deadener that might be in the way. The grommet will be located just above the gas pedal.
-
Make an incision in the center of the grommet just large enough for your cables to fit through. Put the grommet back in place, and route the cables to the radio location.
-
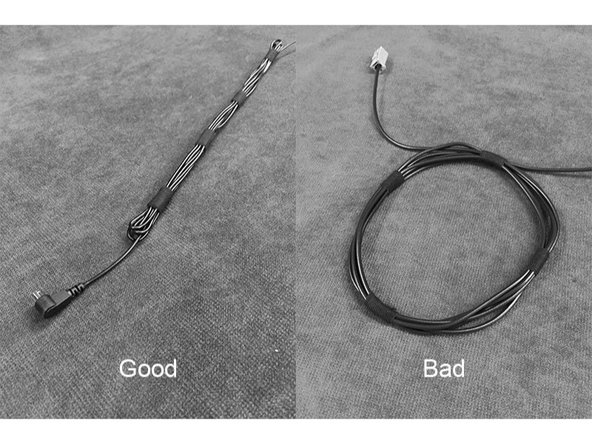
Tip: Don't coil excess satellite antenna cable in a circle. This will cause poor reception due to the signal cross talking between the coils because of the signal constantly moving past it's self in the same direction.
-
You can however make a large coil (about 6" in diameter) and collapse the loop into a back and forth run of antenna lead. This will cause the signal to switch back and forth in direction, eliminating cross talk.
-
That's it!
-