Introduction
Tips on how to install a BMW 3 Series Factory alarm.
Credit: CC 330i[E90Post.com| E90Post.com]
Parts
-
-
1. Remove Negative Battery Terminal. To get started, first disconnect the negative battery terminal. As you know, the battery is in the trunk (or "boot" for you English-English speakers).
-
The nut on top of the negative (black) terminal is 10mm. I put the removed negative terminal on a rag so that it would not drop back on to the battery or touch the positive terminal.
-
2. Install Ultrasonic Module into interior of car. To install the Ultrasonic Module, you must pop open the rear dome light fixture inside the cabin. Make sure you do the REAR one (aft of the sunroof). This was not specified in the instructions, and I spent about 1 hour figuring out that the front light fixture was not correct!
-
To remove the rear dome light fixture, I used a plastic spatula as a pry tool so as not to damage the headliner or plastic. When you do this MAKE SURE your hands are very clean, as you will stain your headliner if they are not (really, I am serious about this). The spot to pry is immediately behind each reading light - the backedge of the fixture.
-
here is a release tab immediately behind each circular light, and you have to get the pry tool in just the right place. I did one side, and then held it with my hand and did the other side.
-
ou should not have to use tremendous force if you get the pry tool in the right place. Don't worry if the frosted clear light surround pops off when you do this, it easily snaps back in place later.
-
Once the tabs are released, I found it easiest to unplug the wiring harnesses to completely free the dome light fixture from the car. (This is not necessary, but it makes the next step easier).
-
Then you simply put the ultrasonic module in place (it snaps in) and reinstall the dome light fixture into the car, taking care to connect the original wiring harness for the lights, and the previously unused one that snaps in to the awaiting ultrasonic module you just installed.
-
-
-
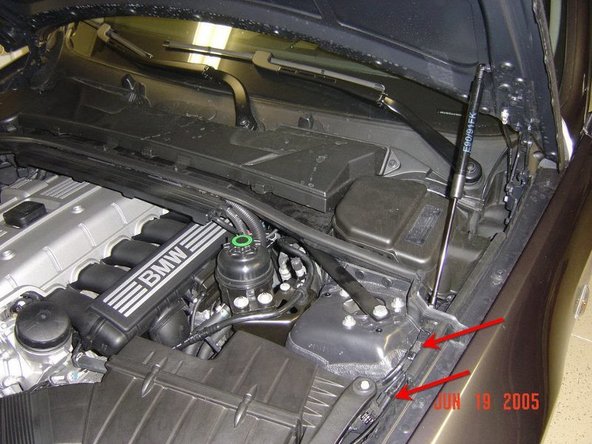
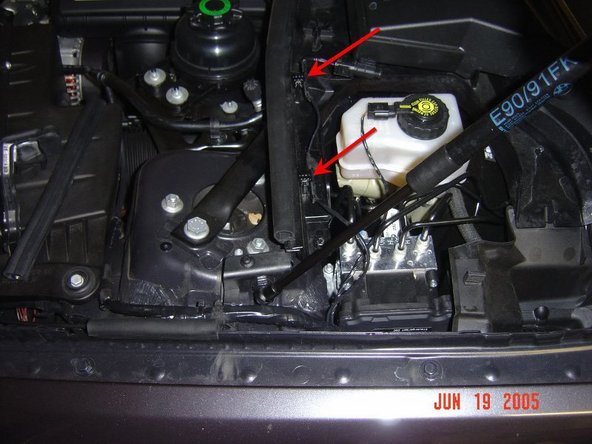
3. Installation of the Hood Switch For the next step, open the hood (or "bonnet" for you English-English speakers) and locate the hood switch wiring along the drivers side edge of the engine compartment.
-
It is taped to another batch of wires neatly. You will see a cap with 3 blue dots on the end, which is a termination for the harness that will eventually plug into the alarm hood switch.
-
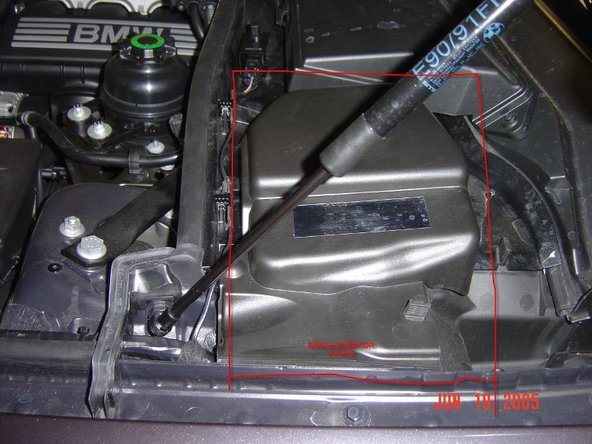
CAREFULLY cut or unwrap the felt tape that holds the hood switch wires to the larger wiring bundle, and pull them up toward the windshield. You will need to remove the cover for the brake resevoir, and it is also easier if you remove the short weatherstripping piece and plastic braket that are shown in the pictures below:
-
-
-
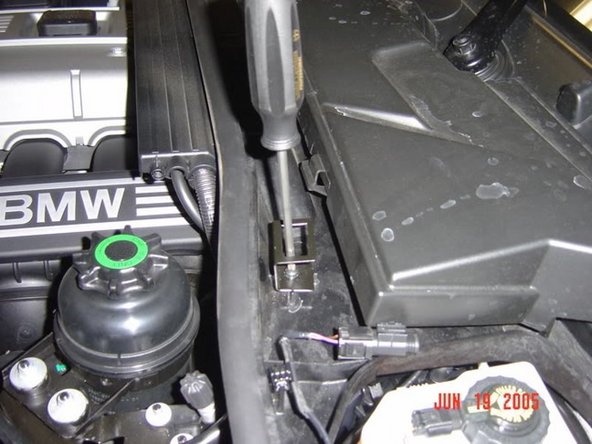
These pieces pop right off easily, but use care when doing the brake reservoir cover. It has a clip at the front and back that you should release when removing.
-
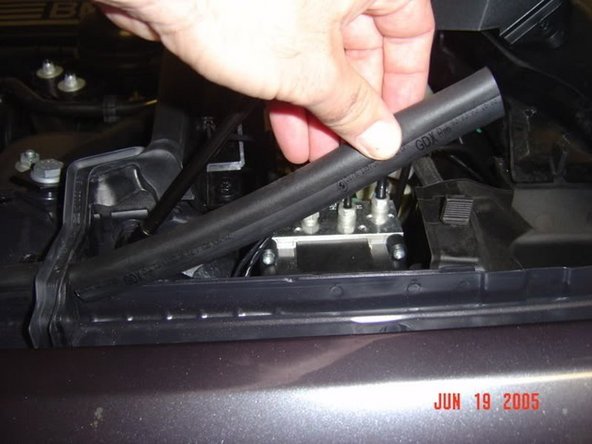
Once these pieces are removed, straighten out the hood switch wiring, and you will notice 2 plastic clips that are used to mount the wiring to 2 plastic tabs in a channel near the hood switch mounting location. Simply push them down onto the tabs to mount them.
-
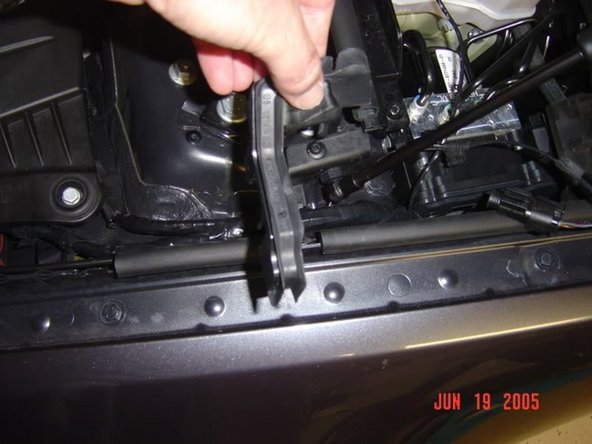
Next, mount the hood switch bracket. There is only one correct orientation of this bracket. The notch in the bracket goes toward the middle of the car and aft. Secure this with the provided screw.
-
-
-
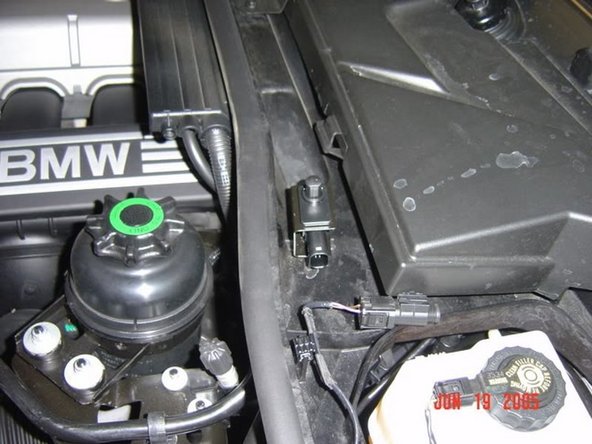
Now, mount the hood switch into the bracket (it basically drops in) and connect the wiring harness to the switch. You must remove the "plug" that is in the connector first. In the pic, the plug is not yet removed.
-
3. Installation of the Siren in the wheel well For the next step, you must jack up the vehicle and remove the left rear wheel. This is the "scariest" part of the install. If you have any doubts about doing this safely, do not perform this install.
-
Apparently there is a special tool that fits into the plastic jacking points under the vehicle. They look like upside-down boxes.
-
I just used a block of wood that I cut for this purpose that fit inside each "box" and protruded down below the lift point just far enough to prevent damage from my flat floor jack platform. I suggest buying the fitting or tool from BMW, though.
-
Before jacking I loosened the lugs slightly (17mm socket) to make it less scary when removing the wheel when lifted. Immediately after jacking the car up, I put 2 jackstands under 2 different parts of the rear suspension that appeared strong enough to support the weight of the car if the jack failed
-
Always assume your jack will fail! Since I had the lugs loosened slightly, I was able to easily able to remove the wheel once lifted.
-
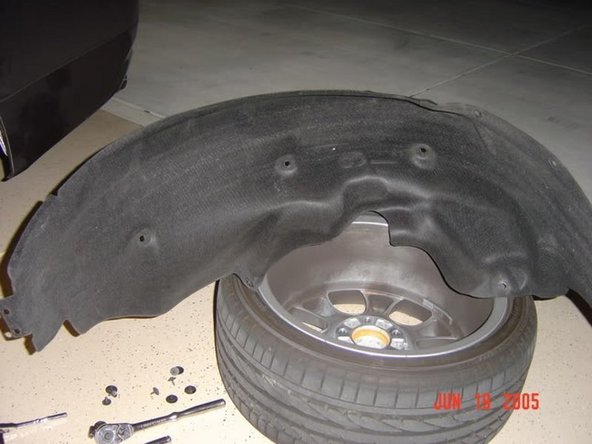
Next you must remove the wheel arch cover, which is the felt lining inside the wheel well. This is pretty easy. There are about 10 nuts that must be removed, 10mm and 8 mm. Make sure you get them all. Then simply pull the felt liner out and set it aside.
-
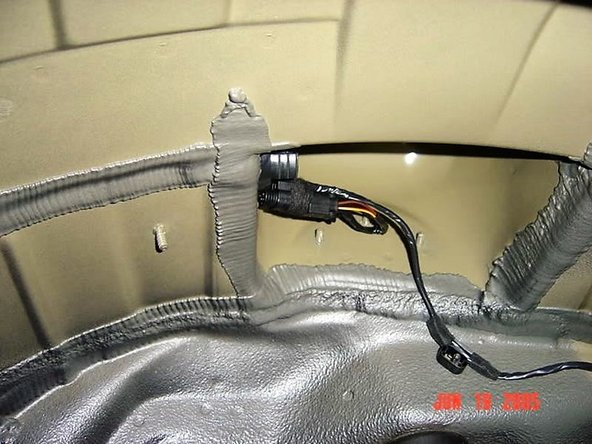
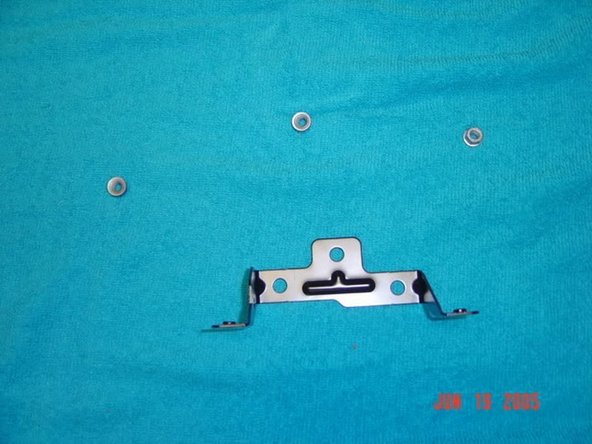
Look up to the top of the wheel well. There is a cavity up there with some unused wiring, which is neatly tied up with felt tape, and 3 threaded studs. Undo the felt tape to release the connector. Place the supplied bracket over the exposed studs and secure it with the hex nuts. (10mm I think).
-
-
-
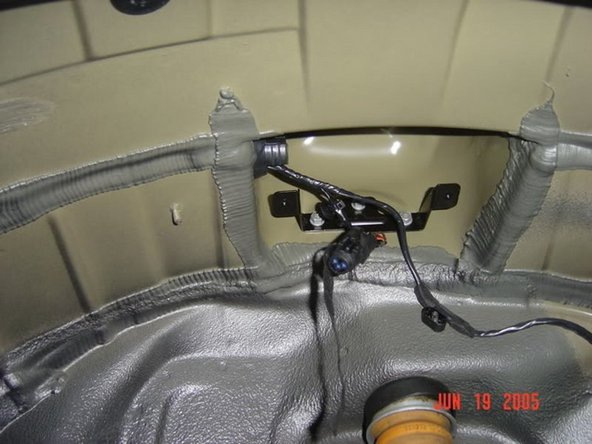
Next, connect the siren to the siren mount with the supplied nut.
-
Remove the "plug" from the connector in the wheel well, and plug the connector into the siren. There is a plastic grommet that pushes into the bracket to support the weight of the siren when it is not mounted. Make sure you push this into the bracket before letting the siren "hang".
-
-
-
Then install the siren mount to the bracket with the supplied screws. Make sure that the wires are not pinched between the wheel well and the siren mount. Securely fasten these screws but do not overtighten. (Sorry, no picture here).
-
Finally, replace the felt wheel arch cover and the rear wheel. Make sure you get the cover tucked in to all the right places and make sure to replace ALL mounting screws.
-
Torque specs for the rear wheel are between 120 and 140 Nm, which translates to about 90 lb/ft. Make sure to use a torque wrench and check the torque again after a short drive. Do not over or under torque!
-
If your car has had the proper software updates and programming, the alarm may function immediately after installation. Mine didn't, and I have to go to my dealer and have the software updated to activate the alarm.
-
If you have Nav, you can configure several parameters of the alarm. If you don't have Nav, you may have to live with all features active. Consult your dealer for different configurations. Enjoy!
-