Introduction
Discover step-by-step details on BMW 330xi E46 Serpentine Belt Replacement.
Credit: kredden e46fanatics
Tools
Parts
No parts specified.
-
-
These are the two belts being replaced, the smaller is the AC belt and the larger is the alternator/serpentine belt.
-
The illustration shows the routing of the 2 belts
-
-
-
First you need to remove the air intake piece that sits on top of the fan shroud by pulling out the three retaining clips that the arrows point to. Carefully pry up the part that looks like a nail head with the screwdriver just enough so you can grab it with the needle nose pliers.
-
Once you have it with the pliers just pull slowly and steadily and it will come out. Be extra careful if you are working in the cold as the plastic could be brittle. Once the three clips are removed you should be able to lift up the intake and wiggle it out of the rubber connection to the air filter housing.
-
Here is a pic of what you are pulling out.
-
Now the air intake is off.
-
-
-
Next remove the bolt on the left holding the fan shroud in. This is where you will use the T25 Torx bit. Interestingly enough the "bolt" on the right side is actually another of those plastic connectors similar to those that held the intake in. Carefully remove that like you did the others.
-
-
-
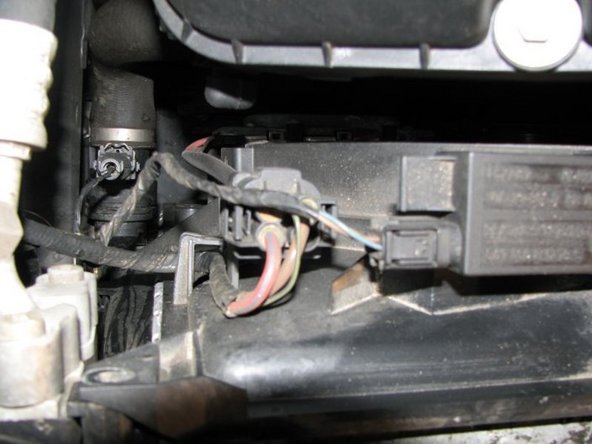
Once those are out you need to remove the two electrical connectors on the left side of the shroud. The smaller connector might be a little tough to remove, you push the tab on the top down and carefully wiggle it off. The big connector should be pretty easy to get off.
-
-
-
Once you have the electrical connectors off you will need to remove the wires from the retainer holding it to the shroud. I found this to be the hardest part of the DIY :-).
-
The retainer doesn't really bend so you need to lift the shroud a bit so you can get your fingers in there to wiggle out the wires. Be careful as you don't want to break through the insulation on the wires.
-
-
-
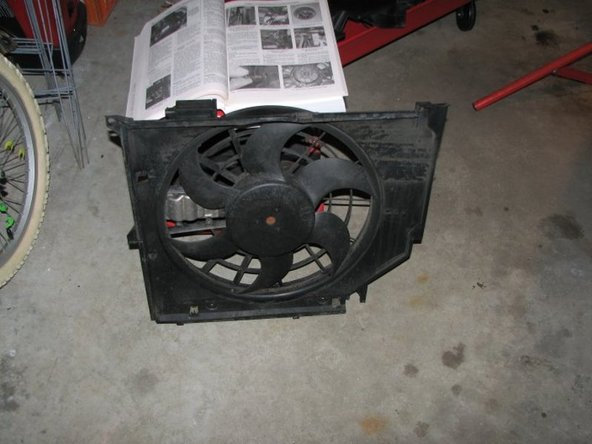
Once that is done you should be able to easily (and slowly) lift the fan/shroud combo out of the car, the right side may catch a bit so be careful. Here is the fan and shroud after it has been removed.
-
-
-
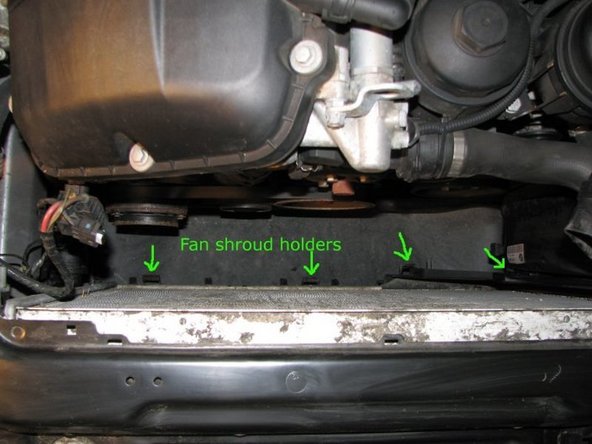
Take a look where the shroud was in the car and note the location of the retaining clips on the car. You will need to make sure that the shroud slips into all of them properly when putting it back in.
-
-
-
OK, now that that is out of the way here is a pic of the belts we need to replace. Note the location of the two belt tensioners that we will need to detention to get the belts off.
-
-
-
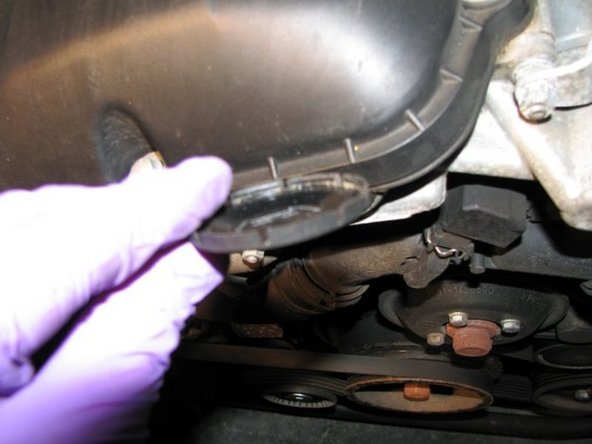
Next you need to remove the dust cap off of the AC tensioner.
-
Here's a picture of what the cap looks like.
-
-
-
Now we need to make use of the T50 Torx bit. To detension the tensioner you turn it clockwise with the ratchet. If you have it as shown in this picture, you push down on the ratchet.
-
This tensioner is not very stiff and should move easily. Mine looked to be in great shape so I didn't replace it.
-
-
-
While holding the tensioner in a detensioned state you should be able to easily remove the AC belt with your other hand.
-
-
-
Now we move on to the alternator (or serpentine) belt tensioner. This is where you make use of the 8mm hex bit socket. A little caution here. This tensioner is MUCH stiffer than the one for the AC belt so make sure you use a quality hex socket bit that will not round off!
-
You will also need a socket wrench with a longer handle as you are going to have to apply quite a bit of force to get it to move enough.
-
Here is a shot of the tensioner with its cap still on.
-
-
-
And now with the cap removed, to get these caps off you carefully pry them off with a flat bladed screw driver. They will most likely pop off and go flying.
-
Also I should mention that you should be careful when working down here so that you don't ding your radiator with any of the tools!
-
-
-
At this point it would be wise to make a simple drawing of the routing that the belt uses around the various pulleys so you don't get confused when putting it back on!
-
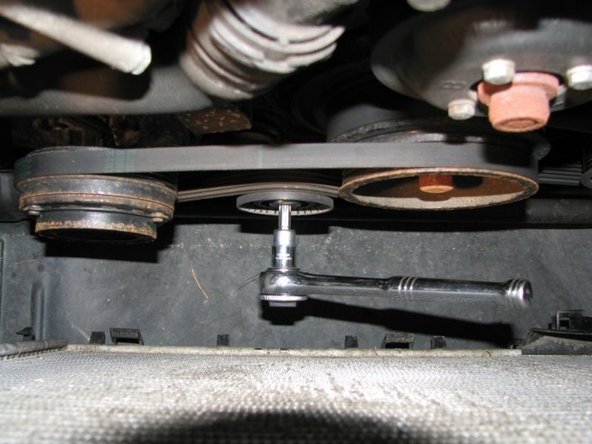
Here I am about to detention the tensioner. Note that I put the reverse clicker on the socket wrench only so I could take the picture without holding it.
-
This one also detensions in the clockwise manner, I found it more convenient to pull this one up rather than pushing down so the wrench is shown on the opposite side of the tensioner as compared the the AC one.
-
As I mentioned, this one takes a lot more force to move so be careful and don't let it snap back as this could break the tensioner! Slow and steady is the name of the game here.
-
-
-
With the greater force needed this belt is a little trickier to get off but you can do it! Here it is almost off snagged on the bit. Just wiggle the bit out and the belt basically falls off. Once again my tensioner appeared to be in great shape so I didn't replace it.
-
Here we are with both the belts off.
-
-
-
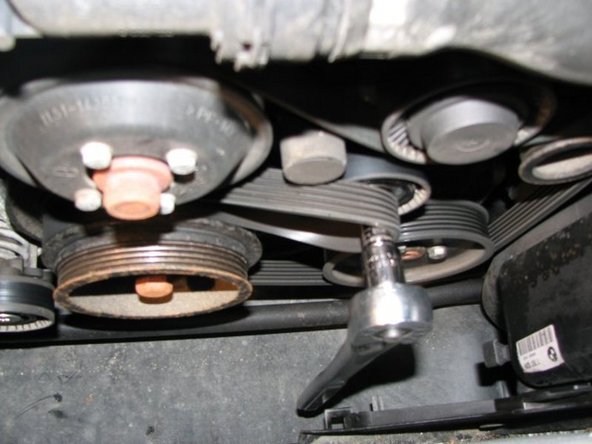
Now time to get the new belts on. First we put the alt belt on. Look at the drawing you made (you did make that drawing didn't you?) and put the belt on all the pulleys except for the tensioner pulley so that it appears as in the picture below.
-
Once that is done put the belt around the hex bit so that you will be able to slip the belt on when the tensioner is detensioned. Now pull up on the socket wrench to detension the tensioner and slip the belt onto the tensioner pulley.
-
Let off the tension slowly. Once that is done check how the belt it situated on each of the pulleys to make sure it is on right, more than likely one of them won't be quite right so detension it a bit again and fix the belt.
-
Once the belt is situated on all the pulleys it should look as it did before you started
-
-
-
Now we need to get the AC belt back on. This one is much simpler. Switch back to the T50 Torx bit and place the belt onto the pulleys as shown in the pic below. Then detension the tensioner by pushing down on the ratchet.
-
Slip the belt over the top of the pulley and let off on the tension. Now check the belt to make sure it is on properly, if not detension a bit and fix it.
-
Put the dust covers back on to the tensioners and make sure they are seated all the way. Now all you need to do is put the fan/shroud assembly and intake back in.
-
Be careful slipping the wiring back into the retainer on the shroud and make sure that when you drop the shroud in that it rests in the retainers on the radiator properly.
-
To get the plastic clip holding the right side of the shroud to the radiator you may have to squeeze the end of it together a bit to get it to go back in. Make sure all the clips are pushed in all the way and you are good to go!
-